
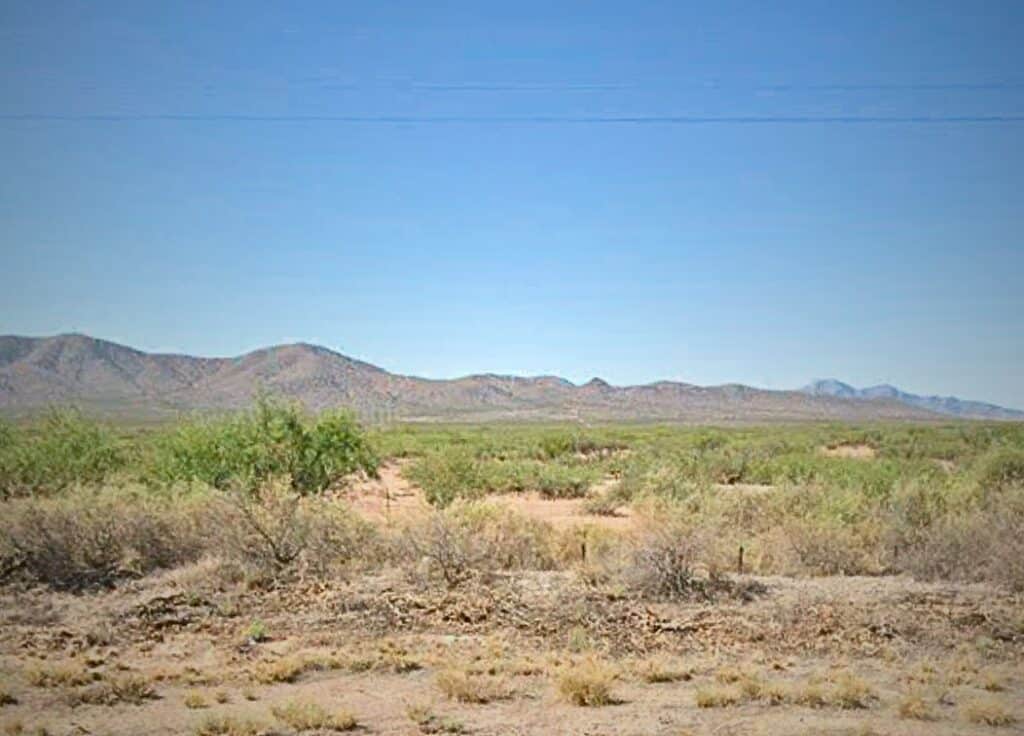
In 2018, I bought a remote 1.25 acre piece of land in Cochise County, Arizona for just around $3,000. At the time this was a going rate for most of the land there. People thought I was crazy, there was nothing on it. No power. No water. Just dirt, desert shrubs, and a lot of sun. Some friends and family said it was worthless land, but after you read this you’ll see that they were far from correct about that. My vision was clear, a campsite my friends and I could use without the hassle of park passes or high camping fees. And so, here’s my story on how I made that happen.
I didn’t buy land to build a house. I bought it as a project for improvement, a campsite I could use and potential flip down the line. I figured, well, people buy junk homes and fix them. But what if I bought just blank land and turned it into an awesome campsite.
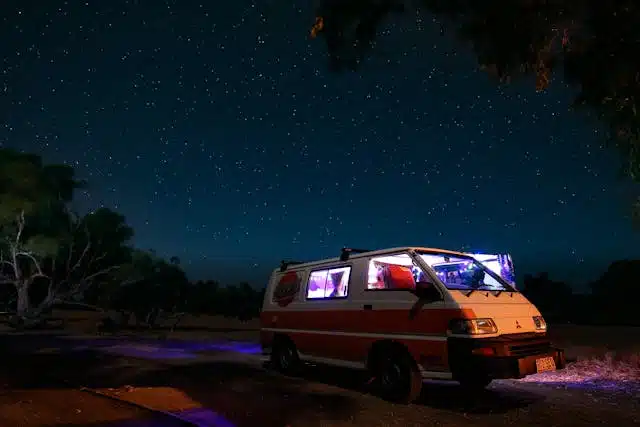
I know I wanted a place I could retreat to on weekends, a set up no stress camping spot where I could take friends, make a fire, and enjoy the stars without hearing a single car. I gave myself a challenge: Make my land a super nice camping spot for under $1,000.
Here’s how I pulled it off.
The Budget Build Begins
The parcel is in Cochise County, Arizona, which at the time was super cheap land. Most lots I looked at were in the $3k range so this wasn’t some rare lot, it was just how the area was at the time. It had no utilities, no neighbors but it was level and it did have a dirt road to it. The area allowed recreational camping, and as long as I’m not permanently living on it, I didn’t need permits for temporary improvements. Which made my low cost project possible.
On a side note from our company, we still have some great lots in arizona, and it’s land under $5k <——— Click Here
At first glance, it was just scrub brush and packed dirt, I did have a survey done to make sure all this was going to be done on my land and not the neighbors. But I could see the layout I wanted, a nice flat area I could camp on, trail to a small shed I could put out and there, campfire spot and positioned on the elevated land so we had a view of the mountains in the background. Overall, the vision was there that I had. And I had seen really cool camping spot ideas on the Hipcamp app for ideas.
Step 1: Clearing the camping spot ($75)
I didn’t rent any machines, it was mainly desert brush so I went full DIY with help from a good friend. I brought a machete, some garden tools, a thick metal rake and brought an old chainsaw just incase to dig down in the dirt. We cleared a 20×20-foot section of land, removing all shrubs, plants, rocks and raked it smooth. It took a weekend, some sore arms, and a lot of sunscreen.
Tip: We learned quite quickly you should first mark out the square area with stakes and rope, otherwise you tend to go off the planned area.
Step 2: Gravel for the Car Pad ($150)
The dirt was fine in dry weather, but I wanted a stable place to park the car should heavy rains come. I had two yards of gravel delivered by a local guy who does side jobs in the area. I spread it by hand and edged it with scrap wood to make a nice parking area. It didn’t have much look to it and I was worried the wood alone wouldn’t hold it together, so we also stacked rocks we collected from the clearing to go around the scrap wood and gravel, which gave it a more car parking look and kept the wood in a stable spot. It works perfectly and looks great.
Step 3: Fire Pit + Outdoor Cooking Setup ($40)
The fire pit we wanted just outside the cleared zone and in the best spot for a view of the mountains. We made stepping stones and cleared a small trail to it and then cleared the pit area. I gathered large flat rocks from around the property and bought some bricks. I don’t know the cost of new bricks but we bought them from a guy that basically just wanted them removed for taking up space.
I leveled the surrounding dirt, we dug out a good sized fire pit hole and lined the bricks to make a wall down in the pit. We packed it with watered down dirt and around the rim laid down the flat stones around it. We also found an old top to what must have been a huge grill on the offer up app, we lay this over the stones when we bbq and it works like a charm. One of the best Tri-Tip steaks we have had.
Tip: Keep in Mind, a lot of the shrubs or desert plants we took out we later replanted in a thoughtfully designed way. Having a stylish garden look is usually costly, but we thought, why not use the free plants we have already. In this case we did a bit of a circular plant design that would go around the fire pit chairs, leaving the dirt area for the chairs around the pit and the plants surrounding the chairs.
Step 4: Shade and Seating ($50)
Arizona sun isn’t a joke. I picked up a huge tarp cover off Facebook Marketplace and strung it down so we could sit and relax in the cleared area over extending to cover the car as well. We put in the basic hook ups like dug holes with PVC pipes for the poles and metal rods for the ropes to hold it down. Stuff like seats, table set up and beer cooler are all things we would bring anyway, it was a place to relax outside the sun and play some music or have some drinks.
We also designed the area with more shrub placement we had from the clearing, it was starting to look like an outdoor garden space by design. Really clean and groomed with a nice design.
Step 5: Tent Platform ($80)
Sleeping on rocks and dirt got old fast, was fine at first but it does have some damage to the tent. Getting free wooden pallets was quite easy just driving around to the back of truck areas and grocery store trash areas. We laid them by digging them half way into the ground and topped them with nailed in plywood we bought at the hardware store. This kept our stuff from getting muddy if it rained and was much more flat and comfortable, also safer for the blow up mattress .We sweep it each time we came and it lifts the tent off the ground and keeps things cooler and cleaner.
Step 6: Shed for Storage ($300)
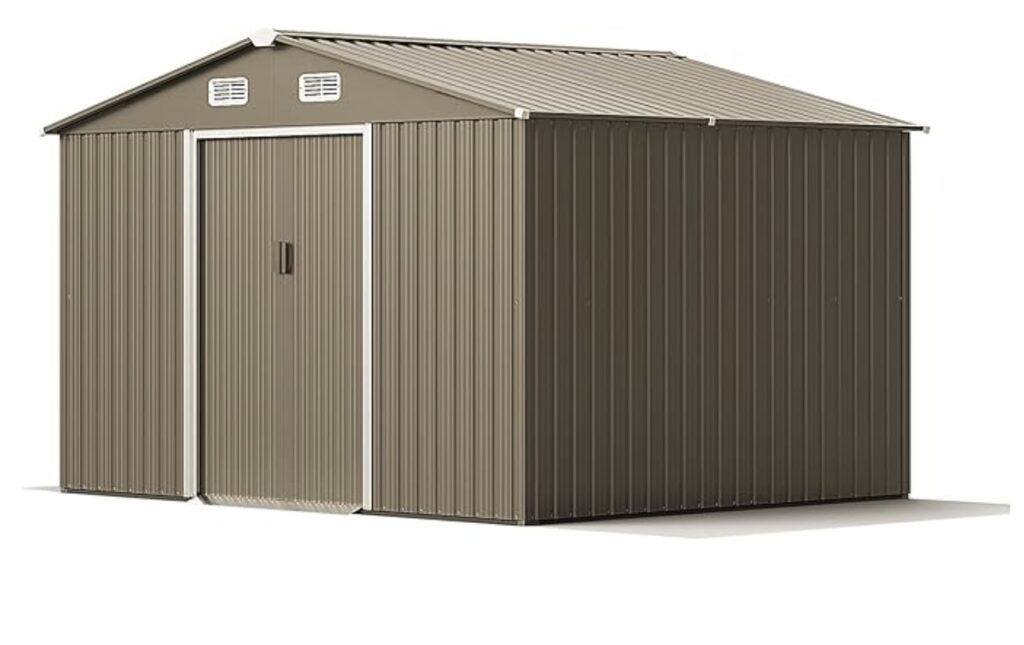
This was my biggest expense. I found a Gotland storage shed on Amazon like the one pictured here. It was under $300, quite big and durable. I hauled it out and assembled it on-site. It holds my tools, solar lights, chairs, firewood, other camping stuff and a few can food bins. My worry was someone breaking into it, and of course that can happen. But while it has a lock on it, I never had any issues at all.
I think there’s a level of respect for off-grid or remote living people in Arizona. Plus, they probably get worried people are in the area are armed. Either way, I wouldn’t keep stuff you can’t afford to lose just incase as we weren’t on this property for months at a time.
Step 7: Solar Lights ($40)
Nighttime is really dark here in the desert unless there’s a full moon. So I installed several solar lights around camping spot, pvc pipes dug in that I could just drop the lights in each time I came. They charge all day and keep the site just lit enough to feel safe and see where you are going. The designing of the lights was key as it really outlines the campground at night. It roughly covers the areas we are in such as the campsite, pit, car zone and shed.
Overall, we made it so all night we can walk around without a flashlight and safely hit the hay. We bought two 12 packs for $20 each off Amazon, it’s a must, really changed this to a nice spot to camp.
Step 8: Rainwater Barrel Setup ($100)
I found a used 55-gallon drum online and rigged it under the edge of my shed roof with some old gutter and a downspout. It was a simple idea to have free water for non drinking purposes. Things like hand washing, dishes, shower and such. It was important to make sure all water that hit the shed roof would be focused into the gutter and into the barrel with a pipe to try and minimize evaporation in the hot days.
We also lifted the barrel using some of the pallet wood and plywood we had left over to get gravity pressure. Added a spigot and even a shower hose attachment. It’s now a simple gray water source and surprisingly, while it doesn’t rain much it fills up quite well when it does. But there are not many rainy days out here, if it’s empty and we plan to stay a good few weeks, we have to get water delivered. It’s around $40 out here, everyone uses it and it’s worth it.
Step 9: Composting Toilet ($40)
Ah yes, it came time for luxury camping. So I made a bucket toilet with a snap-on composting lid which came with bags. I made an area near the shed so you can rest the back while sitting on it. I wanted it a little raised off the ground as you never know what bugs are in the dirt at night. So I made a little porch of sorts with more wood surrounding the bucket and used some left over plywood for the foot area. Is it fancy? Not at all. But it does beat doing it in the desert at night.
The best addition was adding an old shower curtain and rod I had in the garage. I attached it to the shed and it makes for a nice private bathroom experience. We cleared this area quite well so we don’t have to worry about snakes in the brush.
Step 10: Palo Verde Tree ($100)
Nothing could improve the site better than having a tree for shade and looks to the campsite. After some research on the area and what type of tree could live without anyone taking care of it in the desert. I decided on a Palo Verde tree, which the only price point that worked was a Palo Verde Tree in a 15 gallon bucket. The more mature trees were very expensive and I would need to pay for planting if it was full grown. Planting seeds would simply take too long and might not survive without me there. While this took time to grow it was an investment in the property that really would change it.
If you have never heard of this tree, it’s quite the survivalist type of tree. Anything from super hot to super cold, major drought to lots of rain, this thing can adapt and thrive. They get anywhere between 15 to 25 feet eventually, can sometimes bloom with nice yellow flowers. But overall, they do provide shade and everyone wants the camp site with a tree next to it for shade. If you are curious about the tree more a California University has a little write up about it here Palo Verde Tree
An Update From Those Days:
Well, the land was a blessing, I used many times a year and my friends were so impressed each time they came out. I ended up getting ATVs so each time we went we explored all over the desert. It was truly a blast, I let many people I knew use it as well if they wanted a getaway. The land was a one time cost, it was no maintenance, no worries and my property taxes were like only $13 a year.
By 2024 land in my area went through some changes, many developments happened, a Walmart shipping center. Some people put up tiny homes, large homes and some did the same thing I did. I started having some relatively close neighbors and found all the people in the area to be quite nice. The area is truly beautiful in my opinion, I felt very proud of the land I made but the hard decision came up.
The areas value changed dramatically, my little “junk” lot, as others told me, had become quite valuable. Feel free to look on Zillow in that area and you’ll see. Inflation made land values skyrocket and Cochise County became a really desirable remote living spot.
I had an agent come out, at first she expected just basic raw land, gave me a selling point of around $15k to $20k. But once she saw the improvements I made, she suggested up to $30k. She was right, the land sold very fast and as those that came to saw it more like a home site of sorts. From what I heard, the new owner put in septic and and solar as well as a well. Has a nice airstream RV set up and could probably even sell it for way more with those improvements.
I miss holding the land, it was very cheap to hold annually with low taxes. I do regret the sale a bit but the cash was much needed for some goals I had at the time. The improvements really changed how I felt about land ownership, it went from just holding a paper to a home of sorts for me which is worth gold really. Given it’s a blank canvas I felt artistic and had full control over how this land would look, and the great part was passing that down. Great experience, thank you LandZero
LandZero Customer from 2018 Russell R.